Crossing Paths

Crossing Paths
Model Melbourne trams

Friday, 17 July 2015

This old house

I have finally got around to completing that house I started in March last year, this was before I became distracted by the invitation to the Caulfield Exhibition that year.

The saga of the house goes like this,

- I found a kit in the back of the cupboard after the refit
- Start building the house
- Obtained invitation to Caulfield
- Put house in study cupboard
- Completed other tasks for exhibition
- Unattended nephew, niece and youngest daughter find house in study cupboard
- Then they 'remodel' the house
- I find house needing some work with one window missing
- Repair house, make missing window into a box aircon conversion
- then find missing window after rework.

Then it was forgotten until the layout expansion, then it was plonked on the layout as potential.

Since then, the construction of buildings on the new modules has gone full parallel ahead, the servo, the depot admin building, the terraces and finally this old house.

This again is another local production, 'Grosvenor Cottage' by BC Models, a highly detailed full coloured printed card kit, HO scale but it works on Victoria Street. As per usual, I have taken some artistic licence with it, the installation of 'fibro' on the rear, then the fit out of alfoil corrugated iron on the roof, together with the addition of a back veranda, plus some external plumbing.

 
'God's own country'
 
 
'it may not be much, but it's home'
 
 
'position and potential'
 
 
The long view from the Ammo Factory terminus
(note the beverage chimney in the background)
 
 
Welcome to 'Plonksville' junction
(nothing is fixed yet, nor are the chimneys)
 
 
The eventual concept of this house is that it is removable so I can take photos of the depot at ground level.
 
From my ever expanding property portfolio under the wires.
Glenn


Friday, 10 July 2015

Some urban density.

Another structure has been built to add to the Junction module, in typical inner urban style a row of Victorian Terrace Houses, this is a local kit that features the style that lined the main roads and back streets of inner Melbourne.

 
Urban Reality

These houses are modelled on the British 'two up and two down' but have verandas/porches on the exterior in an effort to tame the Australian summer, usually of brick construction, these houses were built for the working class that served the industries of a inner suburbs.

For a fair time these sort of properties housed tenants that were on the lower end of the social economic scale, Melbourne suburbs such as Fitzroy, Collingwood, Richmond and Carlton are still full of these houses, but the demographic has moved on from the working poor, migrants and university students to urban professionals (yuppies/trendies/dinks) and recently the hipster generation. This is due to the proximity to the central business district/city centre.

A certain number were obtained and demolished by authorities after the second world war as these were the worst of slum housing, and were replaced by prefabricated concrete high rise flats (public/community housing), a concept that still reverberates to this day.

The era I am trying to capture is the transition from a gritty working class area to gentrification, each of the three houses tell a story, the left house features a 'home business', the second/middle house a student share house, the right a recently renovated/restored home.

 
Student share house
(I just noticed I have not fitted the facia board)

The kit while basic, was improved with addition of printed brick sheet, and the course of bluestone foundation, is a strip of 600 grit wet/dry sandpaper. The middle house has had the top veranda built in as an extra room using my 'Fibro' technique. The kit came with printed windows and iron lace work that offers some character, and as with all structures on Victoria Street, was extensively kit bashed to fit in as a low relief structure.

 
The fast filling junction module.
 
There are still some more details to add such as chimneys and weathering. All the buildings on this module are not fixed to the surface as yet, so I can finalise positions of span poles and the trolley wire, also a back board needs to be installed to all newer modules.   
 
Gratuitous tram photo.


From another time before hipsters sat around on milk crates stroking their beards while sampling bespoke micro brewed beer from jam jars after riding their fixed wheeled pushbikes.
 
 
'Heading out to the races'
 
 
'A quiet Saturday afternoon'
 
 
From the wrong side of the tracks.
Glenn


Friday, 26 June 2015

Digital Pyromania.

I have recently become the part owner of a small domestic laser cutter, the other parties include the bride and her brother, ( the same one that assisted at last years Caulfield exhibition). As the bloke who had spent twenty five years in the caper of moving parts, it has now been designated my task to assemble and commission this device.

As the bride works at an educational institution that has this sort of equipment at her facility, she has been delegated the OH&S guru and chief troubleshooter, the brother in law will be the video tech who will post the results on YouTube or Australia's funniest house fires.

 
All together on the kitchen bench.
(not to be operated inside the house!)
 
As it came in kit form, there was some tidying up of sharp edges and some rough looking 3D printed components. The unit went together well due to the detailed instructions.  The 'fun' part with most things computer related is finding and uploading to appropriate drivers. The main circuitry is Arduino supported, running Java software, so those familiar with JMRI decoder Pro will know what fun and games can be had when starting out. This is the A3 version, so big enough for O scale.
 
The concept is similar to CNC engineering, X and Y axis, instead of spindle speeds, it is laser intensity cooperating with feed rates. As I did not go the CNC path in a previous career, my CNC exposure was pretty much stuffing a felt tip pen into the morse taper of a CNC milling machine and drawing shapes on a blotter pad, after feeding it punched tape from an old telex machine at trade school. Things have changed since then.
 
 
There will now be more time in front of a computer.
 
It is a good thing that the bride is not only my I.T Guru but also has this technology at her work place, so the learning curve will be a family affair. As part of the package CNC software was included. Therefore plenty of learning about Vectors, EPS, DXF, AI, and SVG, WTF!
 
 
"Let the flames begin"
 
So far testing is going well, I have managed to plot and cut squares in paper with this rather expensive etch-a-sketch, and still not sustained a burn or lost an eye.
 
 
Safety first in the great outdoors.
 
So there we have it, I now have the means to produce detailed, straight and square models, now I will have to grab a note book and a tape measure and then head off to the tram museum at Hawthorn.
 
From under the intense beam of light.
Glenn.
 
 
P.S. Just because I have this, does not mean I will do all your projects. I am not that bloke with the ute that will help you move house on the weekends.


Friday, 12 June 2015

Two birds, with one stone and a brand new arrival.

It has been somewhat busy around here since the last post, I have proceeded with some structural works around the junction, in the time being the household has made welcome a new arrival, much to the delight of my now two older girls, they now have a baby brother. All is well, and I am glad that I have stockpiled materials previously to tide me over until the next chance for some expenditure.


Now and try and fit a DCC chip in this!

The junction module is in the process of being filled out with structures. The low relief back scene will have three terrace houses to the right, the depot administration building to the left. The right foreground will have a Victorian weatherboard home and across the junction, a service (gas/petrol) station/motor mechanics workshop.

The kit for the 'servo' is a Metcalffe card kit, as the whole building is way too large for the site available, the fore court and retail outlet will be separated from the two storey workshop at the back, the workshop will become the administration building for the tram depot, thus two birds, with one stone.

"Contents may vary from that displayed on box"

The 'servo' has a rather small footprint,  and the modellers licence is getting a good workout,  compressive detail and some forced perspective, that and the fact the intended model was not meant to be built as a triangle has provided some construction entertainment. As the 'servo' is modelled on the early mechanics workshop of the earlier twentieth century, with kerb side pumps, itself fast becoming a rarity with the competition of large oil company sites with multiple pumps on large corner allotments.

The servo

The depot administration building has worked out quite well across the depot throat from the servo, the contrast of two competing interests, the car and the tram, the car is gaining ground after taking a small foothold right on the doorstep of the tram, this also adds to the inner urban clutter, where the tram shed is 'back of house' in regards to the street scape, hidden off in a lane way as most services are.

The Depot Office

As I have stated in the past, the Metcalffe kits are a great source of inspiration, sure you could follow the instructions to the letter and have a structure exactly like the one on the box and on most layouts across the world, or you can get a little inventive, and kitbash it until it bears little resemblance to the original design, also there is scope to add extra detail and weathering, all that is required is a sharp knife and a sharper imagination.

Here are some more photos...

 
Across the junction looking towards the depot.
 

Inside the workshop.


From the Depot Shed roof.
 

An overall view showing the small footprint of the servo.
 
 All in all, a nice little project, The servo is fitted with LED lights in the ceiling for future illumination, given the small size together with multiple layers, the servo is now as solid as a brick outhouse.
 
 
From under the wires and now with a nappy bucket.
Glenn.


Saturday, 25 April 2015

Works at the Junction and the Depot.

Since the Easter break, there has been some more work done to the layout, the paving of the 'junction' and the depot is now completed with tarmac and road markings.

 
W5 800 cars out from the depot, while SW6 870
observes the compulsory stop at the facing points of the 'junction'.
 
 
870 picks a break in traffic to pull out from the Ammo Factory,
while 800 is edging across the junction.
 
As you can see in the above photos, neither the concrete of the tram tracks, or the tarmac and road markings are dead flat or ruler straight, as per prototype. The tarmac is 600 grit wet/dry sandpaper, cut and trimmed to size, the edges are dressed with a grey felt tipped pen, patches of 'tarmac' are glued to the 'concrete' of the tram tracks for pot hole/broken rail repairs.
 
The road markings/clearance lines are strips of office paper cut to a width of just over 1mm, then glued with PVA directly to the road surface.
 
The Depot roads received a similar treatment of tarmac, clearance lines and fouling marks.
 
 
Rollingstock lined up at the Depot.
 
The fouling marks are between the rails on the individual roads, no tram is to proceed past, or be berthed over them when another tram is in the area, so not to have a collision, the clearance lines are so other vehicles are aware of the potential overhang of the rollingstock. The white dusty marks on the tarmac are where the drivers have tested their sanders before entering service.


The fouling marks and clearance lines at work.

 
Looking out from road 2 at the Depot
along Victoria Street.
 
This weekend marks the one hundredth anniversary of the start of the Gallipoli campaign, and in turn the observance of Anzac Day,(Australia's memorial/remembrance day).  I did a post a few years ago about this and its significance.
 
This year I assembled a few more people around the cenotaph at the Victoria St and Epsom Rd end of the layout.
'Lest We Forget'

 From under the wires,
Glenn


Tuesday, 7 April 2015

There's more than one way to skin a rabbit. (Easter)

The Easter weekend, so much to do, so little time. As with everyone else at this time of year, there is a requirement to catch up with friends and family.

 
Victoria Street gets a visit from the Easter guinea pig.

It started on Good Friday, drive east across town with the bride and kids to visit friends, while doing this, gladly chip in a few coins for the Royal Children's Hospital Good Friday Appeal at every intersection we stop at, then south to the outlaws to drop the kids off. Then back home so the bride can do her graduate diploma assignment, with a sly trip to the local pub for a counter meal.

Easter Saturday, I wake early to a quiet house, prepare myself for a trip to the Hobson's Bay Exhibition, the bride surfaces, a quick dash down the road for real coffee and croissants, then the bride settles down for study as I head off to the exhibition.

At the Union Hall at La Trobe University, I roll up just before opening, a quick chat with a bloke from work, then it's show time. With the renovations going on at the university, the exhibition is spread across three different levels of the building, with some layouts and traders hidden in rooms the size of broom cupboards, as there was not any published floor plan of the show, it's was somewhat reminiscent of a  M C Escher's drawing of forever climbing stairs.

Given the space constraints, there were some great layouts from far a field as Adelaide and Canberra, all being of Australian prototype. This time the wallet relented and I obtained some infrastructure.


- a foam servicing cradle,
 as I am fed up of knocking off the route number boxes
 off my W's every time they need a look over.
 
 
W5 800 having a lounge on the cradle.
Bachmann Mech with NCE D13SRJ decoder.


- a rerailer, for feeding rolling stock on/off the layout.
 
 
The rerailer in rest mode acting as a buffer at the
end of road three at the depot.
 
 
- and some tram related books.

On returning home, I was inspired to give some of my fleet the once over in the new cradle and shuffle them from the racecourse to the Ammo factory and back, again and again, much to the annoyance of the bride who at the time was having writers block down stairs.  After a directive to cease and desist, I thought it would be wise to suspend services, thus weather and detail the track at the Ammo factory.

With some die cut autumn leaves, water colour paints and a flock covered foam rabbit, details were added to the module. The foam rabbit (AKA future landfill) is one of those trendy items that is covered in a faux grass like flocking, unfortunately the ears were broken off, reattached, then broken off again. Now the rabbit resembles a guinea pig. The skin has been removed from the ears and clumps of weeds now flourish along the open ballasted tracks of the module, with more foliage along the rarely used siding.
 
The ears of the Easter guinea pig.
 
 
The Ammo factory, now featuring bunny fluff.
 
 
W5 800, doing some 'daisy cutting' on the siding.
 
 
Weeds with a dash of autumn leaves.
 
 
Now for the fence and the overhead.
 
Finally the bride had enough, so back to the outlaws late on the Saturday night, for the Sunday Easter egg hunt.

On the layout front, Sunday was a write off, and Monday morning was spent at a nephew's birthday party. Eventaully we make it back home, Monday afternoon, sans bride, who stayed the night her parents to finish off her assignment minus interrupting kids, myself as 'Mr. Mum' was kept from layout duties.

So much for a holiday long weekend.

From under the thumb,
Glenn.
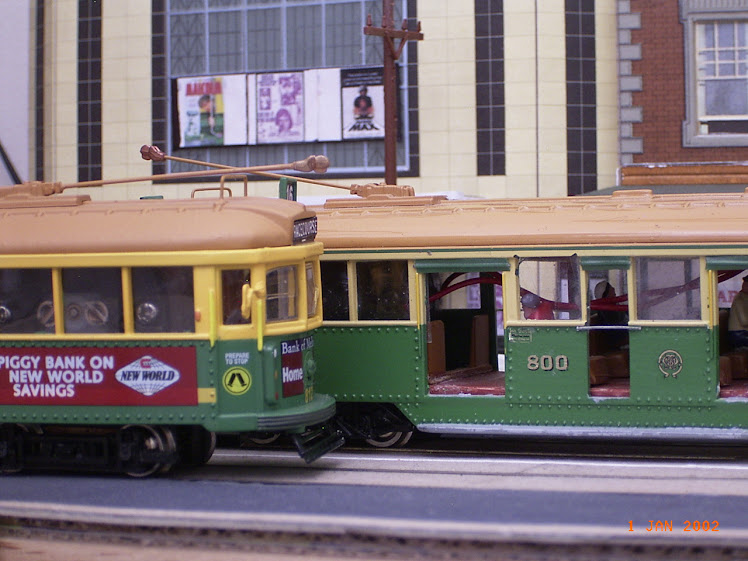

Wednesday, 1 April 2015

Hooray! we are back on track.

Now that the shelving of personal injury project in the front room has been completed to the satisfaction of the domestic authorities, I can get back into working on Victoria Street.

 
Back running services.

The  Ammo Factory module is taking a rest at the moment while I tackle the construction of the road surface of the junction and the Depot.

My method of paving tram tracks involves the use of a lot of dense corrugated cardboard and several cereal boxes. I have tried various forms of plaster/filler in the past, but find the process extremely messy and it usually plays havoc with the electrical side of things with ordinary running results.

After pinning and glueing the bog standard code 100 track to the board, I build up the surrounding road surface with a couple of layers of dense corrugated cardboard (usually sourced from boxes of new small appliances, beer cartons while plentiful , are too corse and spongy for the task).  This is glued into place with PVA glue, the aim is to build to just under the rail head height.

In between the rails, strips of cereal boxes cut into 10mm wide strips, which are glued directly to the sleepers/ties. These strips are cut to smaller lengths (20-25mm) for the curves, which are glued in a brickwork like fashion, depending on the card three to four laminations are required to bring it up the under the rail head height.

 
From little things, big things grow.
The start of the road base.

The road surface for the tram tracks is made up of strips of cereal boxes that are 80mm wide, which are glued at right angles to the rails,  I draw a pencil line along the strip of card that is placed across the rails and with my fore finger I press down and run it along the rails underneath so the score the card with a mark that can be used as a cut line. The pencil line is a reminder of where you intend to glue the strip.

 
The first twenty foot wide slab being cast.

I score, mark, cut then glue each part of the strip as I work across the tracks, in between the rails the aim is to have a sample that is 14mm wide, so to allow for the flange ways. I like using PVA glue, because it allows the panel of strip to be 'floated' into position.

 
Scoring the strip parallel.
 
 
Checking for size.
 
 
Steady as she goes.
 
 
As I have not mastered the art of cutting a smooth curve with scissors, (most of my efforts look like the edge of a fifty cent piece), I knock the 'corners' off with some 240 grit wet/dry.
 
As with anything track related, testing while installing is a must, just in case one little install results the rollingstock going off for a wander. Here is a small gallery of the 'works in progress'.


Albert Rd and Victoria St
(Ammo Factory Junction)
waiting for the 'tarmac', 400 grit wet/dry sand paper
with office paper line markings.
 
 
The Depot, just waiting for the between the rails fit out.
 
 
While this may not be everyones cup of tea, the other reason I prefer this method, is that if there is any drama with points, track or wiring, I can apply a few drops of water, soften the PVA, then remove the affected part without resorting to a hammer and chisel.
 
 
This Easter Weekend marks the Hobsons Bay Model Railway Club Exhibition, this one exclusively exhibits layouts which are of Australian prototype, so no Thomas, British, or US, just Australian. Always a good exhibition to enjoy.
 
From amongst the road works at this end of the layout.
Glenn