Finally the trolley wire is up left of the railway bridge on Victoria Street.


After about eighteen months since the beginning of construction of the new modules, (the depot, the junction and the Ammo factory), the trolley wire sits resplendent above the rails.
Now to be quite honest, I thought I would not be able to get this up before the Sunshine model railway club exhibition, the first weekend of August; however the lucky combination of an early shift and and the bride heading off with the kids to her parents for a few days during the school holidays allowed myself to knock over this task.
The method of hanging wire is a bit of a dark art that requires a little planning and a fair crack of patience.
The materials that I use for this project are;
- coat hanger wire (span poles)
- multi strand copper earth cable
- craft beads (insulators)
- PVA and five minute epoxy glue
- a sharp felt tipped marker pen
A collection of hobby tools required are;
- a soldering iron and solder
- small side cutters
- a 300mm/12" steel rule
- a cutting mat
- a few spring loaded clothes pegs

Let the fun begin
Now in a perfect world, be it 1:1 or 4mm:1', all span poles would be evenly spaced around the curve, in reality street infrastructure such power (utility) poles, driveways and other obstacles. This is where it becomes interesting.......
The span poles are the first to go up, straight coat hunger wire cut to length with a dash of black paint on the bottom like the prototype.
Some span poles are reworked Atlas telegraph poles with a cross arm removed and a few insulators knocked off to resemble the power (utility) poles that line the tram tracks of suburban Melbourne.
The span poles are glued into blind holes drilled into the base board, these holes should be a snug fit for the poles.
The next is the span wire made from the strands of the copper earth wire, the strands are 0.6mm (.024") thick.
To straighten the strand, I roll the strand between the steel rule and the cutting mat.
First cut the wire longer than the span being covered, one end is coiled two to three times around an off cut of coat hanger wire, then five of the small craft beads are threaded onto the wire and are left to slide along the wire at this stage.
The coiled end is slid over the top of the span pole, pulled taught then coiled on the opposite pole across the tracks. Rinse and repeat.

The span wires at the Ammo Factory
On the curves along the tracks, pull off wires are required for the intermediate span wires so the trolley wire can be centred above the track.
These are soldered to the span wires close to the span poles, care is required when soldering close to the plastic power poles.
The intermediate span wires are threaded with the beads and soldered to the underside of the pull off wires, again the beads are left to slide for the time being, the spring loaded clothes pegs assist in holding the wires during soldering.

When all of the span wires are in place, finding where the trolley wire will sit is the next stage.
I have for this task cobbled a wire centering tool made from a non powered Bachmann Brill trolley bogie, a blob of Blu-tak and a tooth pick. Crude but effective way of finding then marking the contact point of the trolley wire to the span wire with the marker pen.

The wire centering bogie
Stringing the trolley wire requires over estimating the length of the run, starting from one then methodically soldering the trolley to every span wire where marked, at this point making sure that two of the beads are between the pole/pull off wire and the trolley wire. The aim is to have along the span wire, two beads, trolley wire, one bead, trolley wire, two beads. The clothes pegs come very handy when hanging the trolley wire and the wire centering bogie can assist in pushing the trolley wire against the span wire for soldering.
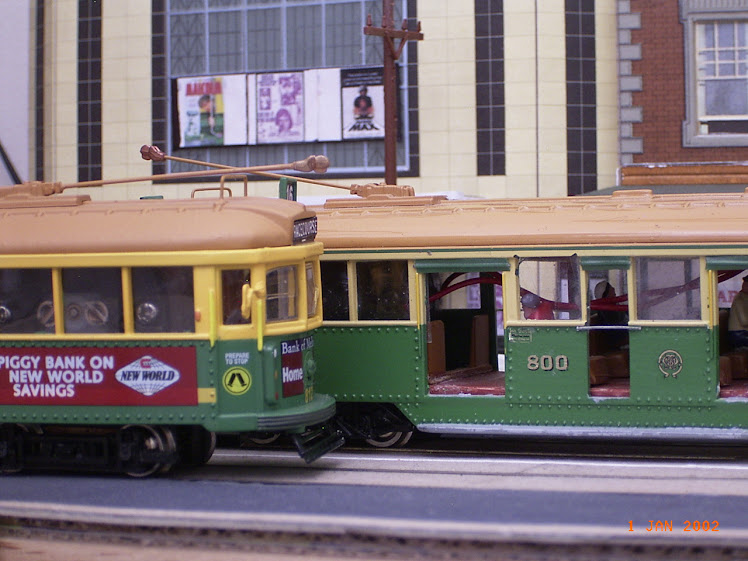
Positioning and fixing the beads (insulators) along the span wire requires the tram with the widest pan on its pantograph for clearance purposes. One bead hard against the pole/pull off wire, the next is placed clear of the passing pantograph, these are glued into place with PVA glue, the one bead between the trolley wire is glued dead centre.
Therefore in the odd chance of a new tram with a wider pantograph fouling the overhead, the beads can be relocated with a drop of water.

Clearance testing.
The positioning of the overhead frogs over the points at the depot, junction and terminus I followed the local but fast diminishing prototype of Melbourne. Trolleyville online also provide tips on hanging overhead wire and fixtures. As the whole overhead had to taper lower to the railway bridge, the whole assembly was set into place by sliding and adjusting the wire height along the span poles, once I was happy with the 'flow' of the wire I used five minute two part epoxy glue to fix the span wires to the span poles.
To finish off, a splash of black paint.

Easing into the Ammo Factory line.

The view from the railway bridge.

Another angle of the tangle
From under the newly installed wires.
Glenn